
- Acoustic science principles behind DIY absorption panels
- Essential materials and construction tools checklist
- Wood frame assembly with sound-dampening insulation
- Data comparison: DIY vs commercial acoustic solutions
- Customization options for visual design integration
- Professional installation techniques and safety
- Optimizing home studio performance with acoustic treatments

(how to make acoustic wall panels)
How to Make Acoustic Wall Panels: Fundamental Principles
Understanding the physics of sound absorption forms the foundation of effective DIY projects. Sound waves lose energy when passing through porous materials, transforming acoustic energy into harmless heat. The Noise Reduction Coefficient (NRC) measures this efficiency, with quality DIY panels achieving 0.7-0.9 NRC ratings comparable to commercial products. Proper placement matters: the quadrant principle suggests targeting reflection points where sound waves directly bounce between speakers and listening positions. Basic rectangular designs effectively treat first-order reflections while maintaining budget-friendly simplicity.
Materials Selection and Equipment Preparation
Procuring suitable components determines acoustic performance and safety compliance. Mineral wool insulation remains the preferred core material due to its 95% air space composition that traps sound waves - Rockwool and Owens Corning 703 offer industry-standard densities between 3-6 PCF (pounds per cubic foot). Wood frames demand knot-free 1x4 lumber with solid corner joints. Acoustically transparent fabrics like Guilford of Maine FR701 permit 95%+ sound wave penetration while meeting fire-retardant Class-A standards. Essential tools include circular saws, staple guns, utility knives, and measuring devices. Protective equipment like N95 masks and gloves prevent fiberglass particle inhalation during fabrication.
Constructing Acoustic Wood Panel Frames
Precision framing ensures structural integrity and acoustic consistency. Calculate panel dimensions based on golden ratio proportions (3:4 or 2:3) to minimize standing waves. Cut lumber using 45° mitered corners for seamless joints, applying wood glue before securing with L-brackets. Allow 1.5-2" frame depth to accommodate 2-4" thick insulation. Rout rounded edges prevent fabric snagging during upholstery. Light sanding creates smooth surfaces that prevent sound reflection distortion. Primed frames increase longevity and enable optional painting of exposed wood sections.
Performance Comparison: DIY vs Commercial Solutions
| Feature | DIY Acoustic Panels | Commercial Alternatives |
|---|---|---|
| Cost (per panel) | $20 - $50 | $100 - $400 |
| NRC Rating | 0.7 - 0.9 | 0.8 - 1.0 |
| Fabrication Time | 1-2 hours | N/A |
| Customization | Unlimited options | Limited selection |
| Replacement Cost | Under $15 | Full retail price |
| Weight | 8-12 lbs | 15-30 lbs |
Material density correlates directly with low-frequency absorption - 6 PCF insulation achieves 300% better bass trapping than standard home insulation. The $0.25 cost per NRC point ratio of DIY solutions outperforms commercial alternatives averaging $1.50 per point.
Creative Design Implementation Options
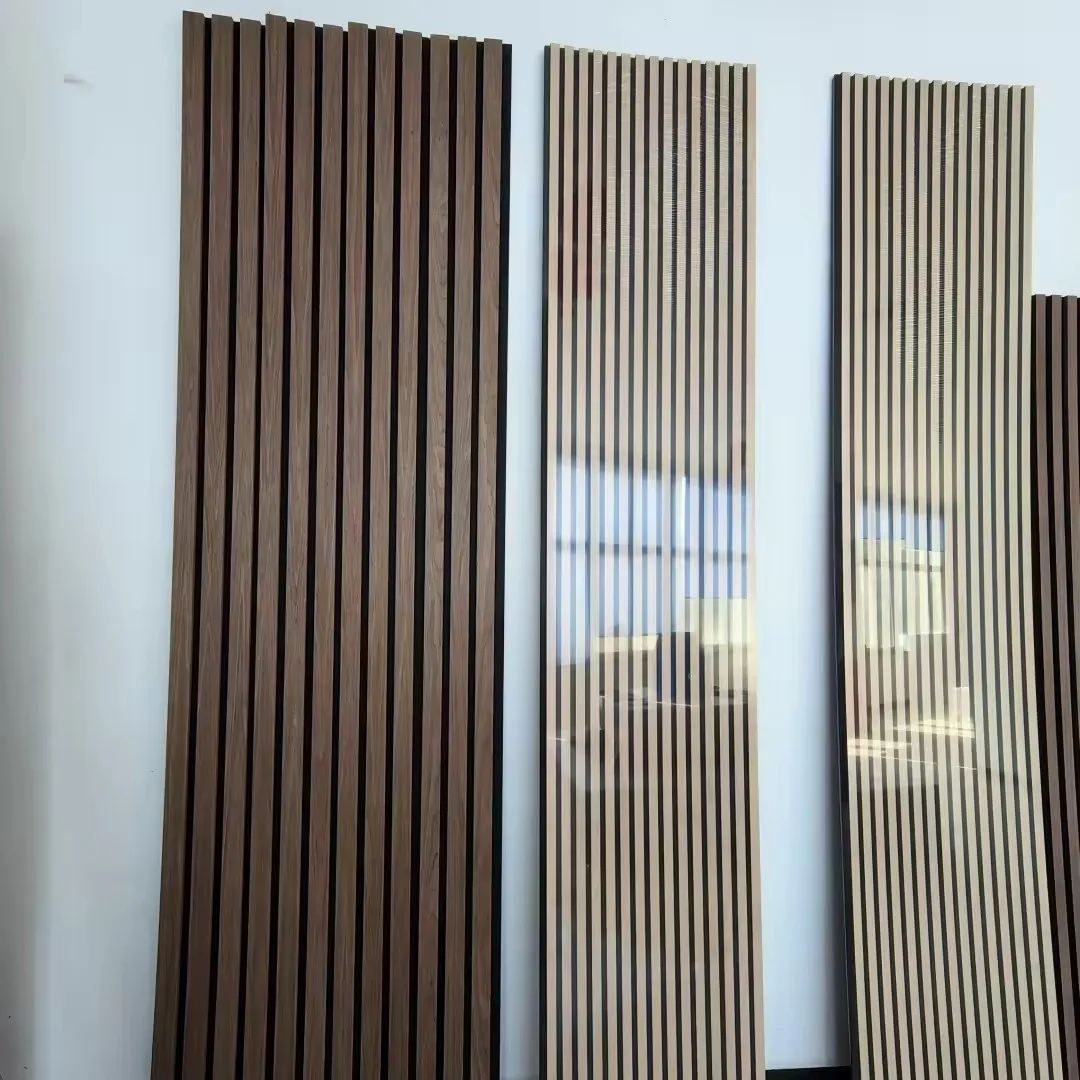
Artistic expression transforms functional elements into decorative features. Fabric wrapping techniques include the envelope method for removable covers versus permanent stretched upholstery. Printed fabrics conceal acoustic properties while creating visual themes - sublimation printing withstands studio lighting without acoustic interference. Multi-panel configurations establish patterns: checkerboard arrangements evenly distribute absorption while hexagon tiling optimizes surface coverage. Perimeter LED lighting enhances visual appeal without compromising functionality. For wood finishes, natural veneers over sound-transparent perforated wood maintain acoustic transparency while showcasing craftsmanship.
Installation Methodology and Placement Optimization
Proper mounting ensures both acoustic functionality and structural security. Identify primary reflection points using the mirror technique: where wall reflections show studio monitors becomes panel placement zones. Rigid mounting brackets should accommodate 125% of panel weight with double drywall anchor support points spaced at 16" intervals. Maintain 2-4" air gaps between panels and walls to improve low-frequency absorption by up to 40% compared to flush mounts. Floating installations prevent building vibration transmission. Safety testing requires pressure testing with 1.5x weight before finalizing installation.
How to Make Acoustic Panels for Home Studio Applications
Commercial studio principles apply directly to residential spaces through scalable solutions. Strategic corner bass trapping addresses problematic 50-300Hz frequencies where small rooms typically experience +12dB peaks. Absorption panels combined with 12" deep bass traps create balanced frequency response with ±3dB variance across the critical 60Hz-4kHz spectrum. Professional results emerge from calculated coverage: covering 25-30% of wall surfaces achieves ideal 350ms reverberation time for vocal recording. The DIY approach delivers substantial savings: home studios implementing 30 acoustic panels report $3,750 cost avoidance versus premium alternatives. Regular maintenance involves vacuuming fabric surfaces biannually to preserve acoustic properties and testing structural integrity annually.
(how to make acoustic wall panels)
FAQS on how to make acoustic wall panels
Here are 5 FAQ pairs in HTML format, optimized for your acoustic panel :-
Q: How to make acoustic wall panels?
A: Build wooden frames, fill with dense insulation like rockwool, then wrap in breathable fabric. Secure tightly using staples or adhesive for effective sound absorption. This reduces echo and improves room acoustics.
-
Q: How to make acoustic wood panels?
A: Create slatted wood fronts using spaced pine boards mounted on frames with sound-absorbing material behind. Maintain precise gaps (slat width) between boards to scatter mid frequencies. Finish with natural stains or sealants.
-
Q: How to make acoustic panels for home studios?
A: Cut 2" or 4" thick mineral wool to size, wrap in acoustically transparent fabric, and mount in DIY wooden frames. Focus on reflection points like walls behind monitors. Thicker panels absorb lower frequencies better.
-
Q: What materials are needed for DIY acoustic panels?
A: Essential materials include rigid fiberglass/rockwool insulation, wooden framing lumber, acoustically transparent fabric (like burlap or Guilford of Maine), and adhesive/staples. Optional: breathable backing fabric and hanging hardware.
-
Q: How to install homemade acoustic panels?
A: Use French cleats, Z-clips, or heavy-duty picture hangers for secure wall mounting. Place panels at primary reflection points - typically wall-ceiling corners and beside listening positions. Maintain 1-2 inch air gaps behind panels for enhanced bass absorption.
-
Waterproof Dog Blankets for Indoor and Outdoor UseNewsAug.01,2025
-
Sustainable Wool Cat Beds Eco-Friendly Choices for Pet OwnersNewsAug.01,2025
-
Snuffle Ball Benefits for Dogs Mental Stimulation and ExerciseNewsAug.01,2025
-
Puppy Treat Puzzles as Social Tools Fostering Bonding Through PlayNewsAug.01,2025
-
Custom Wooden Pet Houses Tailored to Your Pet’s PersonalityNewsAug.01,2025
-
Corrosion Resistance in Environments: A Guide for Washer Hose ClampsNewsAug.01,2025